I Tried the Da Vinci Eye App
I kept seeing other artists using the Da Vinci Eye app on Instagram, and eventually curiosity won. I thought — let me try it out, record it, and share the whole honest experience so you can decide for yourself whether it is something worth adding to your practice. Spoiler: it is strange, it is useful in specific ways, and painting a panda while staring at my phone instead of my paper was one of the weirder things I have done in the studio.
What Is the Da Vinci Eye App?
Da Vinci Eye is a free app — though if you want to use your own photos rather than ones from their library, that is where a paid version comes in. The concept is simple: the app superimposes a reference image over your paper through your phone's camera, so you can see both your hand (or brush) and the image at the same time. It is essentially a digital tracing tool, inspired by the old-school technique of using a camera obscura to project an image onto a surface.
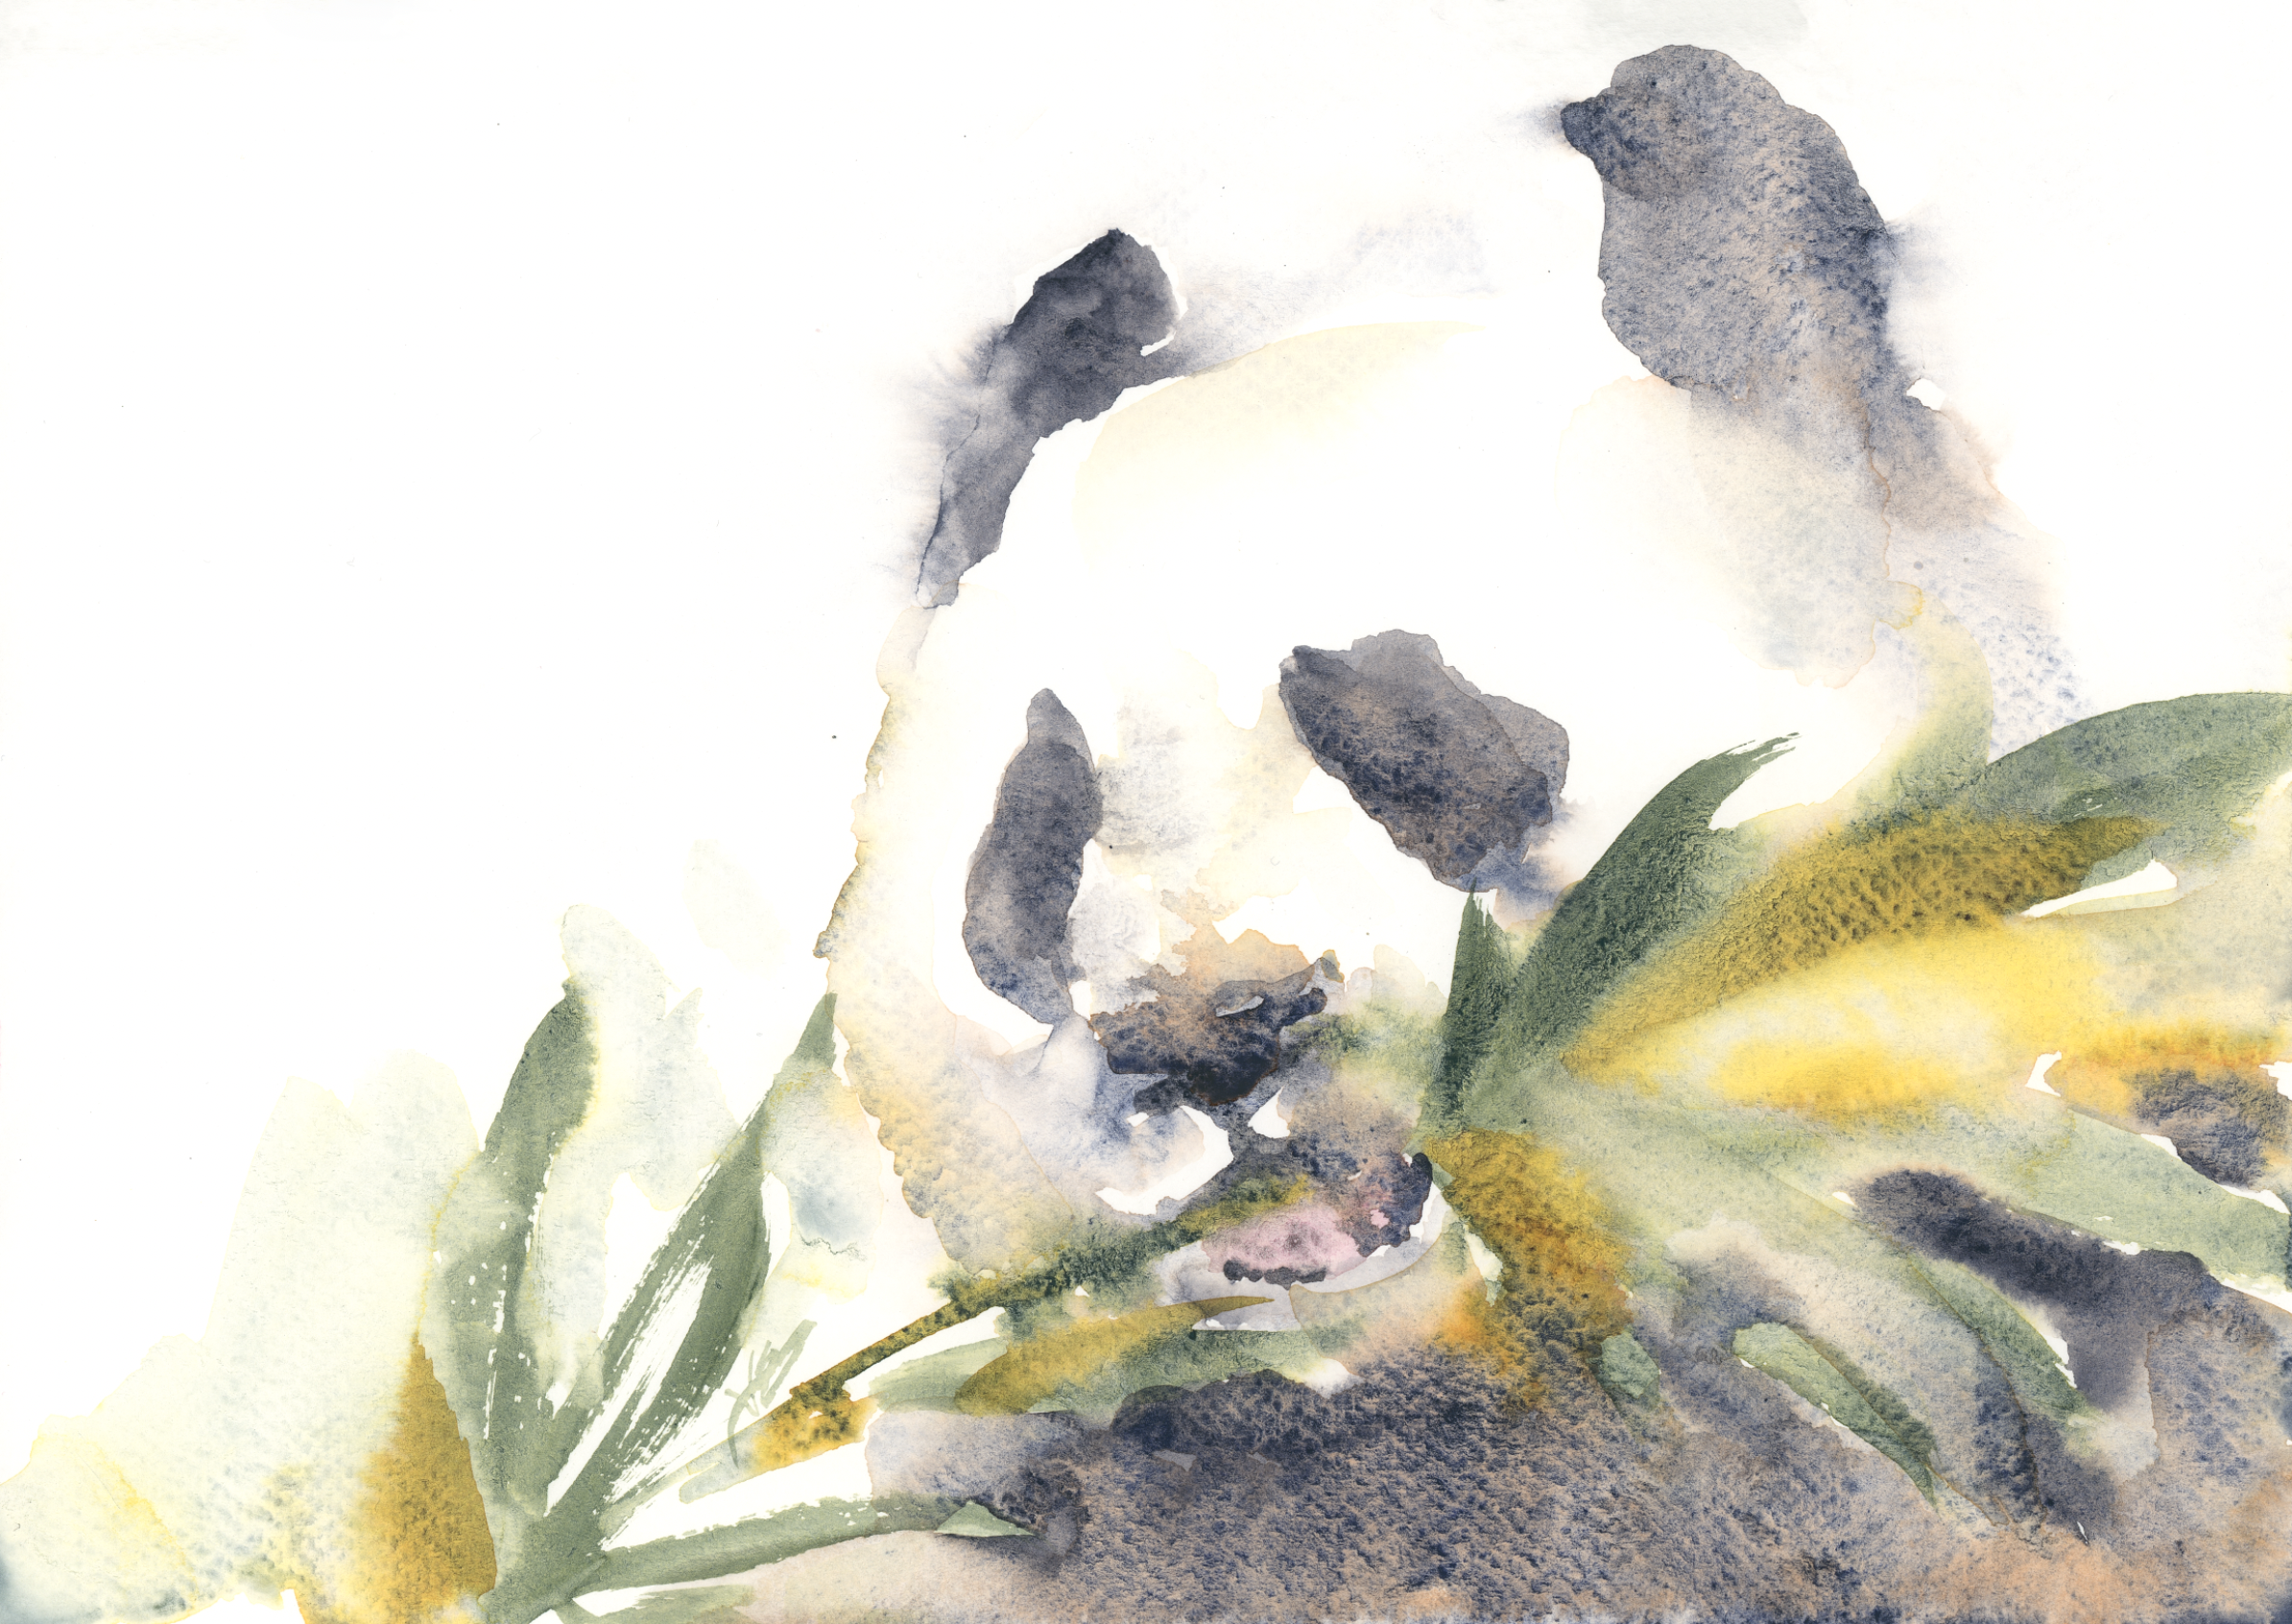
I opened the app, went to New Inspiration, and browsed the built-in photo library. I landed on a panda — friendly subject, clear shapes, easy enough to work with. I selected Classic Mode, clipped my phone to its holder above my paper, and got to work.
My Setup and Paint Choices
I propped my paper up at a slight angle and positioned my phone above my webcam so the superimposed image was visible while I painted. This immediately meant I would be looking up at my phone constantly rather than down at my paper — which felt deeply unnatural from the first brushstroke.
For this study I kept things simple with three colors. My main workhorse was Lapis Brown from the Rockwell Art Magic Set, a granulating paint I love because it separates into secondary colors as it dries — so even using just one pigment, you get a lot of visual interest. I also brought in Onat Diamond Yellow (which is actually a green despite the name), Magic Wizard for warmth and variation, and a touch of Moray Witch for the pink tongue. My paper was Fabriano 1264, which lifts beautifully — something I was very grateful for more than once during this session.
Painting the Panda: What Actually Happened
I went straight in with dark pigment — no sketch — loading up a size 10 brush and starting with the eye area of the panda while watching my phone rather than the paper. And I cannot overstate how strange this is. You are painting on one surface while your eyes are locked on a digital screen six inches above it. Your brain knows what your hand is supposed to be doing, but the feedback loop is completely scrambled.
I built up the panda's face using dark Lapis Brown, loosely mapping the eye patches, snout, nose, and mouth. Rather than painting the panda's head directly, I used some negative painting around the ear — painting around the shape to capture the light, leaving a gap but connecting in a couple of spots so the form faded away softly. I did not want a tight, illustrative panda. I wanted looseness. Atmosphere. The kind of look I aim for in all my work.
At one point the snout area got too dark, but Fabriano 1264 came to the rescue and I lifted the pigment cleanly. I have said it before and I will keep saying it: watercolor is not as unforgiving as its reputation suggests. Use a brush, use water, and most mistakes can be softened or removed entirely.
Adding the Bamboo, Shadows, and That Pop of Pink
Once the face was in a good place, I moved on to the bamboo leaves using the Onat Diamond Yellow green. I kept the brushstrokes loose and let some of them run off the edge of the paper — when everything is too contained it starts to feel tight and fussy. A few strokes of Magic Wizard added some warmth and variation into the greens, because pure bright green can read a little flat on its own.
I mixed Lapis Brown with Magic Wizard at a light value to outline the face using soft dots, then bled that inward toward the panda rather than outward. A light value of any warm shadow color is more flattering than reaching straight for black when you need definition without hardness. I added that same warm shadow to the nose and connected a few shapes around the jaw.
And then came the pink. The mouth was open, the tongue was visible, and a little pop of Moray Witch made it immediately charming. A touch of warm color among all that cool blue-green and dark brown does something really nice. After that I darkened under the jaw with Lapis Brown to give the face some separation from the body — a classic move that just works.
The Moment Things Got Exciting (A Cautionary Tale About Paper Towels)
I tried to lift out a few leaf shapes from the bamboo — which looked lovely — but then went back to darken the eye area and the paint started seeping somewhere it was not supposed to go. Lesson learned: always have your paper towel within arm's reach. I grabbed one, pressed it down, and lifted. Do not scrub. Scrubbing damages the paper and makes a recoverable situation into an unrecoverable one. Press and lift, press and lift, and you will be fine.
My Honest Verdict on the Da Vinci Eye App
For what it is — a free tool to help you place an image on your paper — it works. The overlay is clear, the classic mode is intuitive, and the built-in image library gives you plenty to work with before committing to any paid features.
That said, I do not think I will use it regularly. I have spent a lot of time developing a feel for proportions and painting without a sketch, so the app does not solve a problem I currently have. But if you are newer to painting without a preliminary drawing — if that blank white paper makes you nervous before you have even picked up a brush — this could genuinely help. It removes one barrier and lets you focus on the painting itself.
I might try it again with a different subject, just to explore further. But for now, the panda study sits on my desk as a perfectly decent little experiment — loose, lively, and painted mostly while staring at my phone. Not bad, all things considered.